
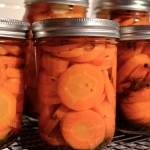
Have you tried making pickles?
If you are like me and the kitchen is cleaned up with the sink empty and bowls and measuring spoons washed and put away before the cookies get out of the oven, you are going to be pretty agitated while making pickles. Even if you clean up as you go, and even if the end result rids your counter of piles of cucumbers, you will still have a whole bunch of tools that need to be kept out and lots of things going on at the same time. It’s not a rushed or stressful process though, so either take a deep breath and suck up the clutter for an hour or so, or pass this task on.
Not coincident to our current CSA membership, this is my third year making pickles, with a few batches per year. I’m not an expert, and still slightly fear passing on botulism or rotten cucumbers or whatever sternly written canning recipes warn against, but making pickles might be easier than you think.
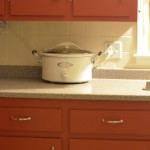
You don’t need special tools. They certainly help to not get splashed with or stick your hand into boiling water, but you can manage without all of the specialty tools. You DO need a really large pot, one that can fill an inch or two over the top of whatever size jar you use. Canners are nice, they are big and typically come can come with a rack liner for easy getting in and out and not clanging around, but I have just used our super large stock pots. This was the first year I invested in a magnetic lid lifter, jar lifter and canning funnel, and it wasn’t much of an investment, about $10 total, and did make things easier.
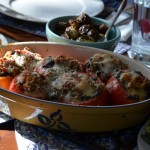
I like pickles for their crunch on my sandwich and not much else. But pickle loving family and neighbors have applauded my pickle efforts, so I thought I’d share my easy pickle recipe… until Sarah dropped off some of her pickles last week and my husband cheered for those. So now I will share both of our pickle recipes.
Jenny’s Dill Pickles
Ingredients:
- Pickling cucumbers (other varieties are fine if you have a million of them, just won’t stay as crisp)
- Fresh dill (if you grow dill, you can break off heads, rinse and pat dry and keep them in a bag or jar in the freezer)
- Garlic
- White Vinegar
- Pickling Salt (in a pinch, you can use Kosher salt with no iodine, caking or other additives)
- Mason jars, rings and lids (You’ll want large mouth canning jars, the size is up to you or limited to the size of your largest stock pot/canner to be able to cover the top with an inch of water. The number of jars depends on the number of cucumbers you have and how you slice them.)
- Big stock pot or canner, and a couple more sauce pots
Directions:
- Put all of the jars you are going to use in the dishwasher and run them through, using the sterilizing mode, if available.
- While the jars are running in the dishwasher, wash all of your cucumbers. Depending on where you got them, they may need to be scrubbed a few times. You’ll think you got them, then you’ll look back and you’ll see you missed a spot and you’ll realize you missed it all. I put the cucumbers in the refrigerator while they are waiting, some people recommend a pre-canning ice bath, Sarah brines hers cold overnight, the idea being that they don’t actually cook during the canning process.
- Peel your garlic. I use about two cloves of garlic per jar.
- Rinse and pat dry your dill. I use two heads per jar.
- When the dishwasher cycle is almost done, fill your canner/pot with water and get it on some heat to start boiling. Mix up the brine in a saucepan (recipe below) and set it to simmer on the stove (make sure all of the salt has dissolved and you’ve stirred it up before using it). Put your lids and rings in another pot of water and set that to boil (so that they are sterilized – boil at least a few minutes).

Brine Recipe
– 8 cups water
– 2 cups white vinegar
– 1/2 cup pickling salt (or Kosher Salt in a bind, but beware of caking agents/additives) - When the dishwasher is done, pull the jars out and set them on the counter. Put one or two cloves of garlic (depending on size and your taste and one or two heads of dill in the bottom of each jar. Cut your cucumbers in the shape you fancy or the size/shape your cucumbers best allow (whole, spears, slices, sandwich slicers, strange creative cut, etc) and pack them in the jars tight. I tend to do a combination of spears and slices, trying to get them the same size/shape per jar, because it looks nicer. On top of your cucumbers, put another clove of garlic and another head of dill.

[I had a bunch of green beans from the garden this time, and made a jar of with them the same way. I’ve seen pickled green beans in a few places, so hope this brine/seasoning works out.]
- Now pour your brine into the jars to 1/4 inches from the top (a canning funnel helps here as they usually have the measurement on them, but I have used a clean ladle to get the brine in from the pot). Use a chop stick or butter knife or some similar tool to poke around in each jar and release any air bubbles trapped between cucumbers or the cucumbers and jar. Wipe down the rims of the jars and make sure no crumbs or dill is hanging out there or it won’t seal correctly or evenly.
- Pull a sterilized lid out of the pan of water and place it evenly on a jar lid (using a magnetic lifter is easiest; but clean tongs work also). Add a ring until it’s “finger-tight.” That’s because air will escape during the canning process, if you’ve screwed the ring down tight, the air can’t get out. Repeat this for each jar.
- Lower jars into the canner/big pot of water, so they are upright and “process” (boil) for 15 minutes. Then pull the jars out and set them on your counter. A jar lifter makes quick and easy work of this, but I’ve also done it with a combination of tongs, getting burned/splashed, and pot holders I didn’t mind getting wet. Let them cool down overnight without disturbing them too much.
- In the morning, remove each ring, and test to makes sure each jar has sealed correctly but gently trying to lift up the lid. It should be stuck on there pretty well. I then replace the rings, some people store them without the rings. Store the processed jars in a cool dark place until they are ready, which is a matter of taste. I wait at least 6 week and up to a year to consume them. Once you open the jar, just use the lid and ring to keep them closed and store them in the refrigerator. You can dump the top garlic/dill if it gets in your way once you open them.

Sarah’s Dill Pickles
Ingredients:
- 6 pounds pickling cucumbers
- 3/4 cup pickling salt
- 4 cups white vinegar
- garlic cloves, peeled
- dill seed
- fresh dill head (if unavailable, use dried dill)
- black pepper corns
- 8 pint mason jars, lids, and screw rings
Directions :
- Rinse the cucumbers make sure all the soil is gone. Cut them how you like. I do coins, or long “stacker”, or in quarters the long way like you are served with a sandwich at a deli, or just the whole cucumber. Place them in a nonreactive glass or ceramic bowl. Add a half cup pickling salt and cover with water. Cover with plastic wrap and place in the refrigerator for 8 hours or over night.
- Drain off the salt water brine. Rinse the cucumbers. Set aside.
- Sterilize 8 pint mason jars, lids, and screw rings.
- In medium sauce pan, combine vinegar, 3 1/2 cups water, and 1/4 cup pickling salt. Bring to boil, reduce heat, and simmer for 5 minutes. Remove from heat and set aside.
- Into each sterilized jar placed 1 garlic clove, 1/2 teaspoon dill seed, 1 dill head or 1/2 teaspoon dried dill, and black pepper corns.
- Pack cucumbers into each jar, and cover with vinegar solution. Leave 1/2 inch of head space. Wipe the rim with a damp cloth. Place on lids and screw bands, tightening only until fingertip-tight.
- Process for 10 minutes in a boiling water bath.
Other Resources from Sarah:
Here are some canning resources that will help further explain the preserving process. Many suggest to get a specific canning pot. I don’t think that is necessary. I use a large lobster pot. It just needs to be big enough so that the jars are submerged in and covered by an inch or two of water.
Good article: http://voices.yahoo.com/how-pickles-using-boiling-water-canner-3633115.html
Good book (the same one the recipe came from): Homemade Living: Canning & Preserving with Ashley English: All You Need to Know to Make Jams, Jellies, Pickles, Chutneys & More


Pingback: Sauerkraut | Two Clever Moms
Pingback: You’ve Got Balls!! | Two Clever Moms