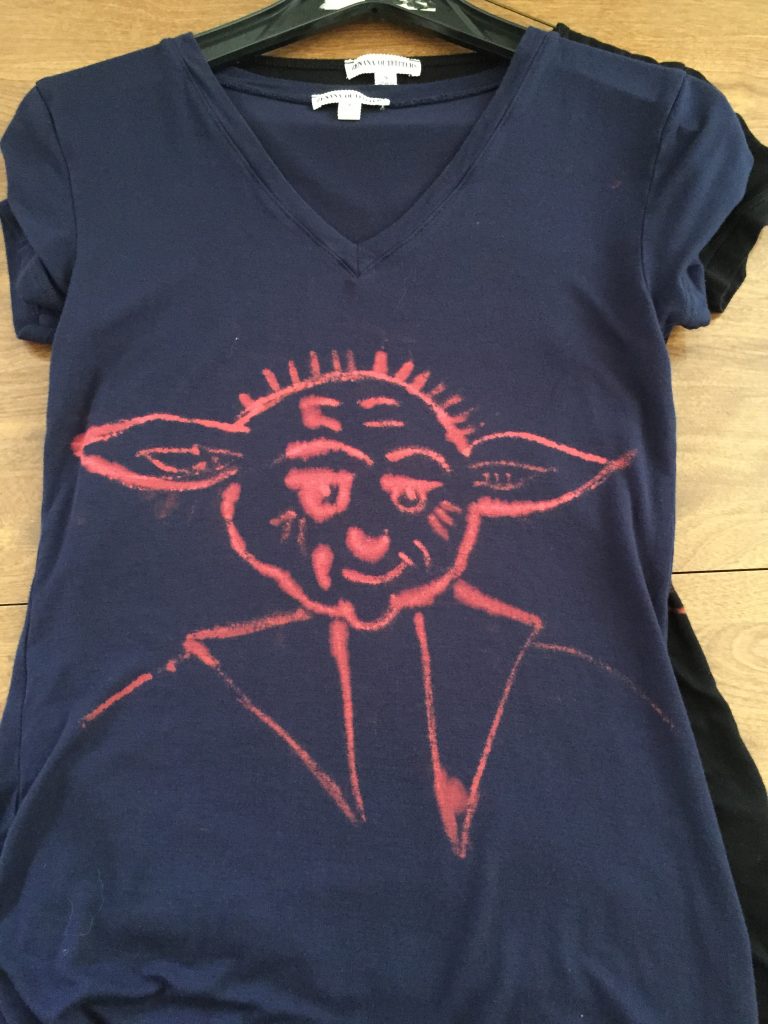

I have just discovered the opposite of Tie Dye! Today I used bleach on a t-shirt to make an image. I took away color instead of adding it – never would have thought!
Here are my steps…
T-shirt Bleach Design
Supplies
- 1 shirt – it doesn’t matter the materials. I used shirts with a rayon/spandex combo. Cotton is fine too.
- bleach
- water
- bucket
- paint brush
- large plastic cutting board
- old towel (we call them dog towels)
- optional paper and water colors
Directions
- I started by painting my designs on paper. It was useful to practice before starting the shirts.
- When I perfected my design on paper I collected all my supplies and put on my yuckiest clothing and headed to the laundry room with a utility sink.
- I lay the towel out on the small table (it really is the extra freezer).
- Mixed 1:1 water to bleach in a small plastic container.
- Placed the plastic cutting board inside the t-shirt. This prevents the bleach from bleeding on to the back.
- I placed the shirt with the cutting board inside onto the towel. I made sure the cutting board was center inside the shirt.
- I filled the bucket about 1/4 of the way with cold water and placed it near by.
- Then I started painting on the shirt with the bleach solution.
- I left the bleach on for about 5 minutes after I finished. The bleaching happens almost immediately so you can see when you get to your desired color.
- Then I dunked the shirt into the bucket of water and rinsed it thoroughly.
- After that I put it into the dryer.
Helpful Hints – After one shirt dried I went back and reinforced some lines with another application of bleach then repeated steps 10 and 11. On another shirt I went back to early when the shirt was still a little damp and the bleach bleed a little too much (see Yoda’s left eye).