Last month I mentioned that I don’t make squash soup like Sarah. With lots of squash available locally for Thanksgiving, I figured this is a good week to share the difference.
I’m guessing Sarah’s soup is sweet, rich and creamy, a treat and a little luxurious – the ice cream of soups. Mine tastes creamy too without the cream, but I’d consider it more comfort food than elegant in flavor. I’d call it baby food for grownups, if that didn’t sound gross, so just pretend I didn’t mention that, and insert the description of something else that will make your belly warm and satisfied.
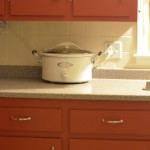
As with most soups, I just sort of throw in what I happen to have around. I made a smaller batch than typical and used the ingredients in the picture below, plus some water, olive oil, pepper, rosemary and 6 cloves of garlic. Generally, I use one of everything – 1 butternut squash, 1 onion, 1 potato, 1 carrot, 1 apple, but if the squash is big, or I have another sort of squash around to add in (ideally acorn), I’ll multiple the other ingredients. Adding in turnip and/or parsnip really adds to the flavor, but definitely don’t add much, because they can overpower the rest, particularly the parsnips. That dirty looking bulb in the left of the picture is celery root, I use a slice about 1/2 – 3/4 of an inch thick and cut it up. It adds the flavor of celery without the stringy texture that sometimes I can’t seem to puree out.
I generally eat this soup with a dollop of sour cream stirred in. But I have also been known to eat it with ravioli mixed in, or even a few scoops of macaroni and cheese. This soup freezes great – freeze some in quart size freezer bags and take one out for a perfect sized quick lunch.
Butternut Squash Soup II

Ingredients:
- Butternut squash
- Onion
- Garlic
- Carrot
- Apple (preferably tart)
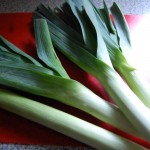
- Pretty much any late fall/winter vegetable in your refrigerator that is white or orange: other sorts of squash, shallot, potato, sweet potato, leeks, parsnip, turnip, celeriac.
- Little bit of olive oil
- Chicken stock, bullion, and/or water
- Salt and pepper to taste (optional)
- Herb of choice (optional), I like rosemary.
Directions:
- This step is optional, but adds depth to the flavor: Pre-roast your squash. Cut all of your squash (butternut and any other) in half lengthwise, remove and discard the seeds and strings. Place skin side up in a baking dish. Poke some vent holes in the outside of the skin. Drizzle with olive oil. I add a little water to the bottom of the dish. I also peel 6-8 garlic cloves and throw them in the dish to roast with the squash. Roast at 375 degrees until soft (about 40 minutes, but really varies on the size, quantity, type and thickness of your squash). If you are not going to roast the squash, just cut the skin off, and cut it into chunks discarding the strings and seeds (you can poke holes in your squash and microwave for 5-6 minutes before cutting, if you find it difficult to get the skin off).

- Chop up your onion, carrot(s), and any of the following you may be using: celery, shallot, leeks, parsnips, and any non-roasted garlic. Soften them in your stock pot over medium heat with a little olive oil for about 5 minutes. I add a little pepper at this stage (and don’t add salt if I’m using stock/bullion).

- Once these are softened, add in the rest of the vegetables – squash in raw chunks or scooped out of the roasted skins; roasted garlic; apple, potato, sweet potato, celeriac, turnip, parsnips all peeled and chopped. Add in any herbs (I use about 2 teaspoons of rosemary).
- Cover in water/stock/combination to an inch or so above the vegetables. This time I used 5 cups of water and ~ 1 1/2 tablespoons of “Better Than Bullion.” There was also a little liquid in the baking dish from roasting the squash and garlic and I poured that in too.

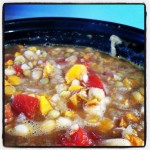
- Simmer until the vegetables are soft and mushy, about 40 minutes. Sometimes I will then cook it down a bunch to make the soup really thick – if you do this and use stock/bullion, make sure it is diluted so the end result isn’t super salty.
- Blend or process until smooth, ideally with an immersion blender.