I love light switch plates. I think it is because I grew up in a house where we had few light switches. My parents still live in an old old antique house built over 200 years ago. Plumbing and electricity were added after years of people living in the house. At night we would have to stumble around to find the lamp to turn on to light a room. The simplicity of being able to reach a switch to light a room immediately before or after you walk in a room is pretty cool.
Recently my big girl realized that she was ready to sleep in a twin bed, no more crib. Together we figured this was an opportunity to turn the white walls in her room to something more fun and transition to a big girl space. I was relieved when she chose green for the walls. A very tasteful green I might add. So while she slept on a mattress on her brother’s floor for a couple nights we painted the room. As I was replacing the outlet and switch covers I decided not to replace the plain white plastic light switch cover. I half heartily searched a couple stores for a fun cover; perhaps a ceramic one with stripes or metal one with an interesting texture. Then at our wonderful local ACE hardware, I found a raw wood switch plate cover and came up with this collaboration.
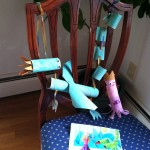
My big girl made this
Switch Plate Project
Supplies
- Unfinished wood switch plate cover
- Small brush
- Primer
- Fine sand paper
- Sharpie markers or acrylic paint
- Varnish
- A couple pieces of newspaper
Directions
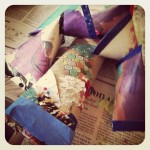
- Place newspaper down to protect the table. Paint the wood switch plate cover with a coat of primer.

- Let dry. Sand with sand paper to make a smooth surface. You may need to touch up the primer if you have sanded down to the wood.
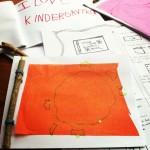
- Under close supervision. Have your child paint or draw on the cover. I found the markers worked well since the colors layer on top of each other and don’t get as muddy as when my little ones have fun with paint.

- Let dry
- Paint a coat or two of varnish over the art work.
- Let dry and cover a light switch.


I figure that we can leave her masterpiece up for a while. As her drawing skills improve I may prime over the current line drawing and she can create another one.
Other Resources
Color theory… To prevent the muddy painting color theory hints are always helpful. Here are the basics:
Primary colors
Red, Blue, Yellow
Secondary colors
Green, Orange, Purple
Red + Yellow = Orange
Red + Blue = Purple
Blue + Yellow = Green
Complementary colors
Red / Green
Blue / Orange
Yellow / Purple
When colors are paired with their complementary color they make the other one brighter and stick out more. However when they are mixed they turn into a brown/grey muddy color.
To completely prevent muddyness stick with one family. Like Red, Yellow, Orange or Red, Blue, Purple or Blue, Yellow, Green.